Most organization have a process for collecting evidence from physical devices during a security incident. But what happens when the endpoint isn’t physical anymore?
As more organization’s move workloads to Windows 365 Cloud PCs, security and incident response teams need a way to preserve evidence when something goes wrong. Whether it is a malware infection, insider threat investigation, compliance request, or a legal hold, this process must be ready and in place when needed so we do not sit there when it is needed and don’t have a subscription ready and permissions in place.
There is a feature in Windows 365 called “Place Cloud PC under Review” which allows administrators to create a snapshot of a Cloud PC and export it directly to an Azure Storage Account for forensic analysis. We can place up to 10 Cloud PC’s under review at the same time.
Why This is important
With a physical laptop, collecting evidence is relatively straightforward. You can isolate the device, create a disk image and start analyzing artefacts.
Cloud PCs are different.
You do not have direct access to the underlying disks, and in many cases the user may continue working while an investigation is taking place. Microsoft solved this by allowing administrators to create a point-in-time snapshot of the Cloud PC and export it to customer-controlled Azure Storage. From there, investigators can work with the exported disk image without touching the original Cloud PC.
This makes the feature useful for:
- Security investigations
- Insider threat scenarios
- Compliance audits
- Legal discovery requests
- Incident response activities
Let’s look at how it works and what you should think about before the day comes when your SOC team needs it.
Prerequisites
There are a few prerequisites you need beforehand:
- Windows 365 Enterprise
- An Azure Storage Account in the same tenant
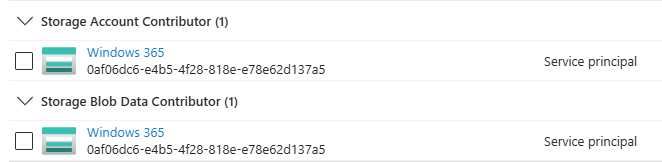
- Proper RBAC permissions on the storage account
It is also recommended to use a dedicated storage account specifically for forensic exports and audit evidence, with the proper permissions. From a performance perspective it is recommended to have the storage account in the same region as the Cloud PC, it will still work even if it is not in the same region, but with a performance impact.
Creating the storage account
Let’s create the Storage account we need, requirements for the Storage account to be used:
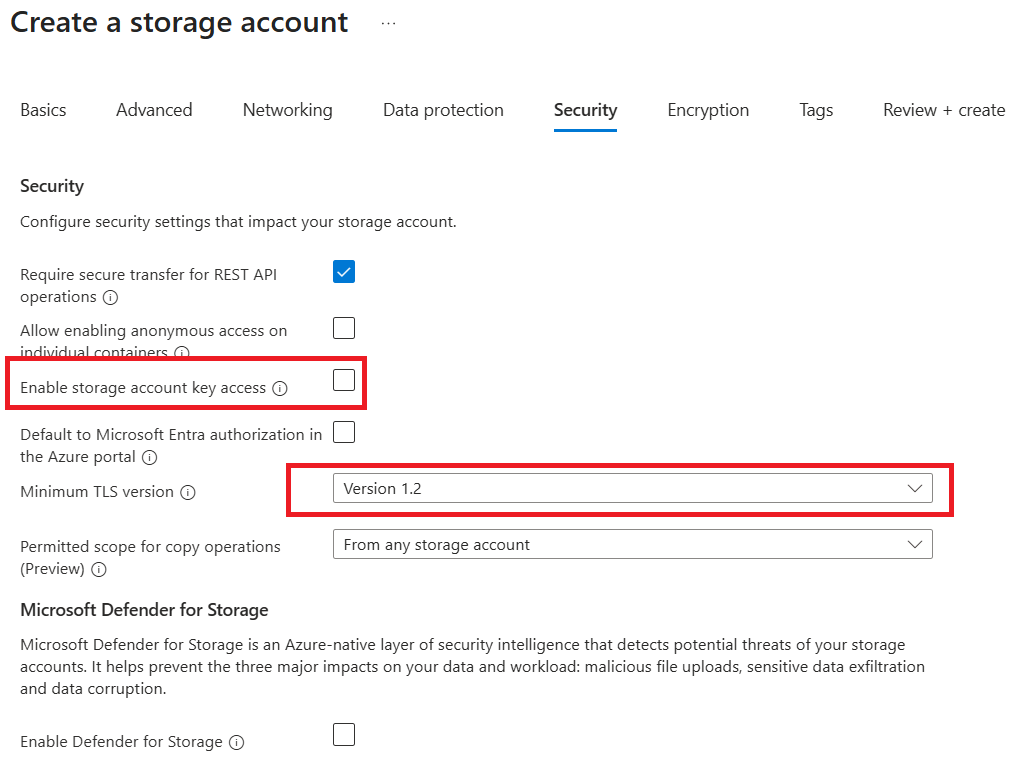
- TLS 1.2 minimum
- Disable anonymous blob access
- Disable storage account key access
- Public network access enabled
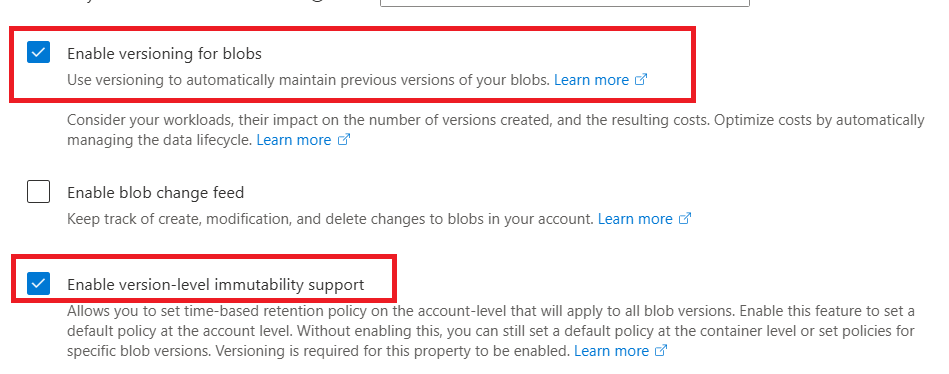
Optional but recommended for evidence that the file is not modified.
- Blob versioning
- Version-level immutability
- Create the Storage account as shown below.
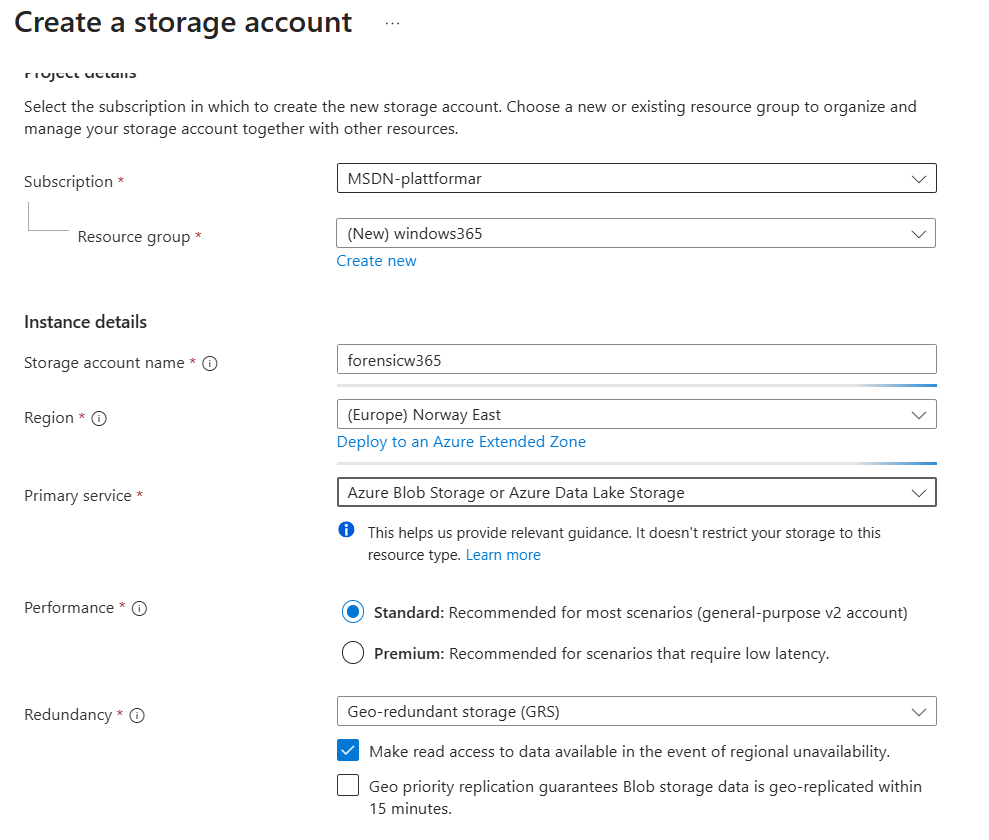
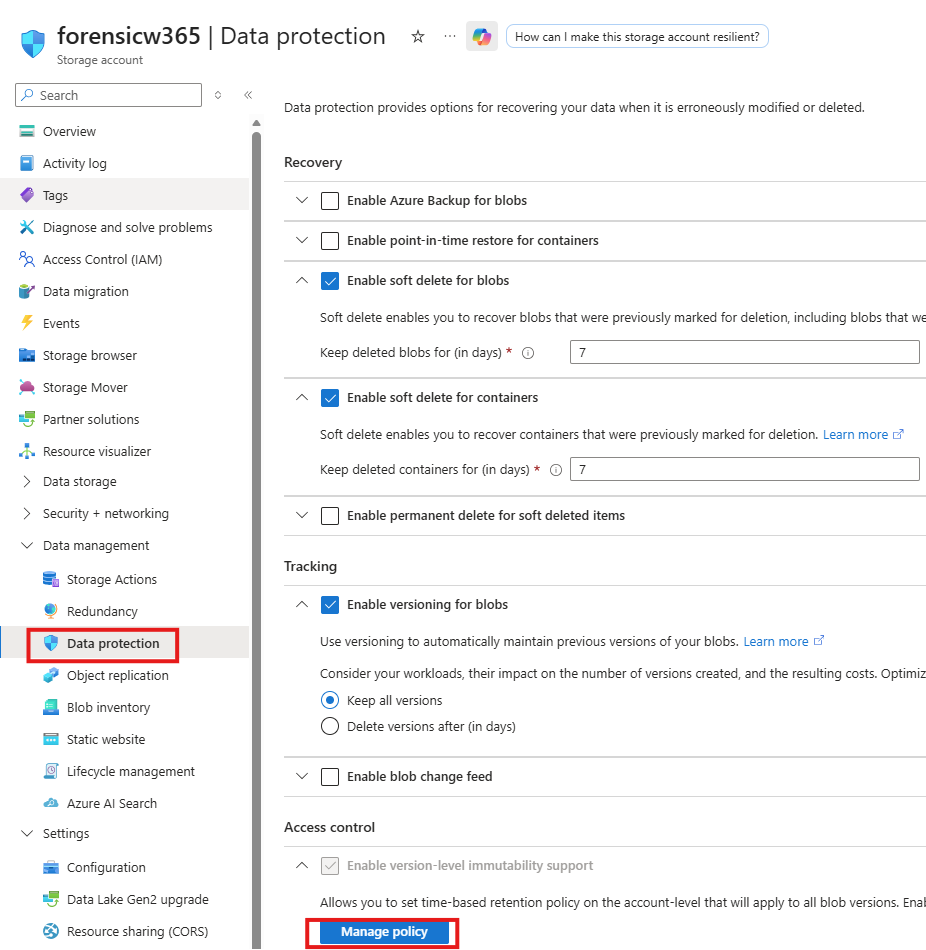
2. On the Data protection tab we select the following to enable immutability support(optional)
3. On the Security tab we uncheck the “Enable storage account key access” and make sure that TLS version 1.2 is used.
4. When the Storage account is created we grant he “Windows 365” service principal both the “Storage Account Contributor” role and the “Storage Blob Data Contributor” role as shown below.
5. Create an access policy for the immutability support(optional)
with the following settings as an example.
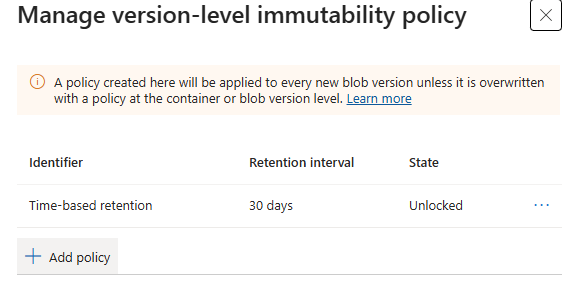
And with that we are ready to place our Cloud PC under review.
Placing the Windows Cloud PC under review
Now that we have the a Storage account in place we can place the Cloud PC under review and no this is really easy.
In the Intune portal select the Cloud PC in that you want to put under review and Select the option “Place Cloud PC under review”
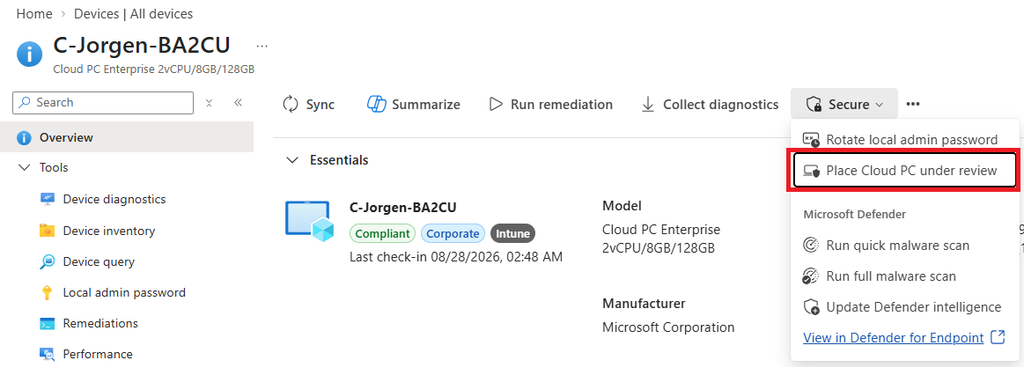
Then we choose the Subscription and Storage account we created, only Storage accounts where the Windows 365 service principal has permissions is shown. This is where se select if access to the Cloud PC should be allowed or blocked.
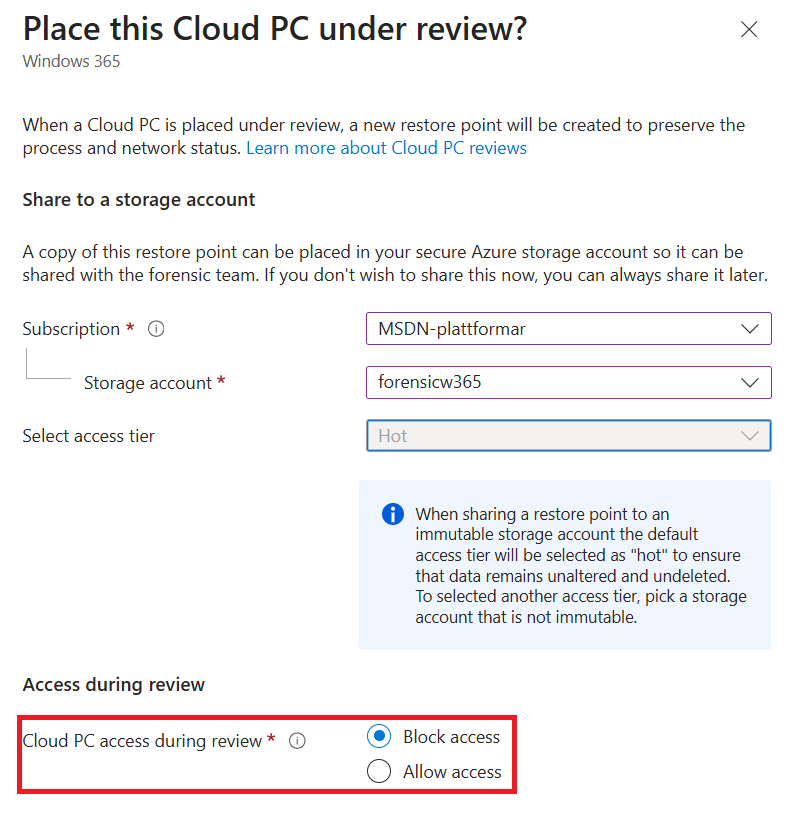
After doing a second validation that we really want to put the Cloud PC under review we are done!
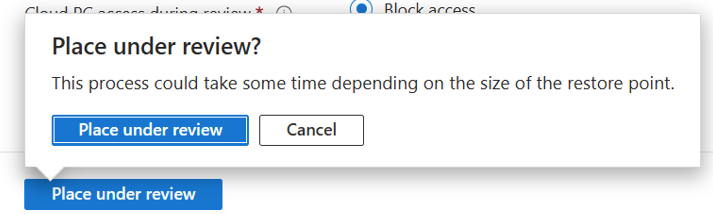
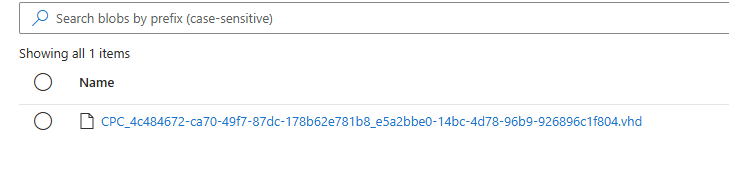
It took quite a while for the image to be uploaded but when the action in Intune is completed we now see the vhd file in our Storage Blob so we can download it and do our investigation.
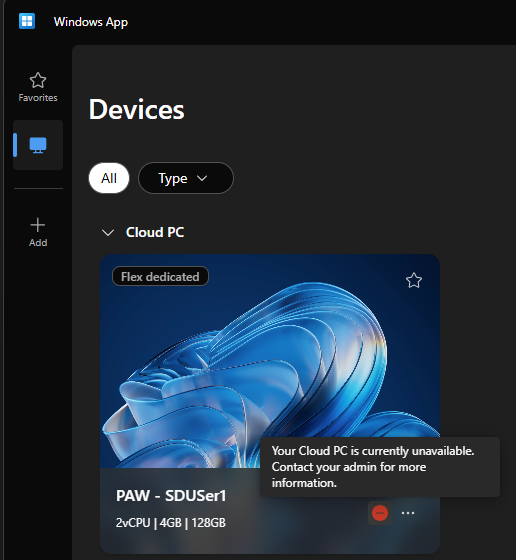
If we selected “Block Access” this is the message the end-user will see in the Windows app. It will not say that it is placed under review pending investigation, instead it says that the user should contact the admin for more information. This is great as we maybe do not want the end user to know it is placed under review pending an investigation.
To sum this up, this is something that everyone that uses Windows 365 Cloud PC’s should have in place when they start using ut. There will come a request to do forensics on a Windows 365 Cloud PC sooner or later and it is not the right time to sort this out when we need to do it, it should be in place already.